Building a Windows ISO from Scratch
Building a Windows ISO using UUPDump
848 Words | 3 Minutes, 51 Seconds
2025-07-24 18:04 +0000
As of the time of writing, you are unable to download a Windows 11 ISO directly from [LINK]. I will be using a tool called UUPDump to retrieve my ISO.UUPDump is a tool that allows you to download access files directly from Microsoft’s update servers. Please ensure you use only the link matching the one I have listed; there are no unofficial mirrors or sites other than the one I provided. Any other sites are likely to be malicious. I will be using the following image:
1. Downloading the UUP Package
The first step to creating our ISO will be downloading the UUP set from here UUPDump. You can choose whichever version of Windows you need. For example, I will be using Windows 11, version 23H2 (22631.5548) x64.
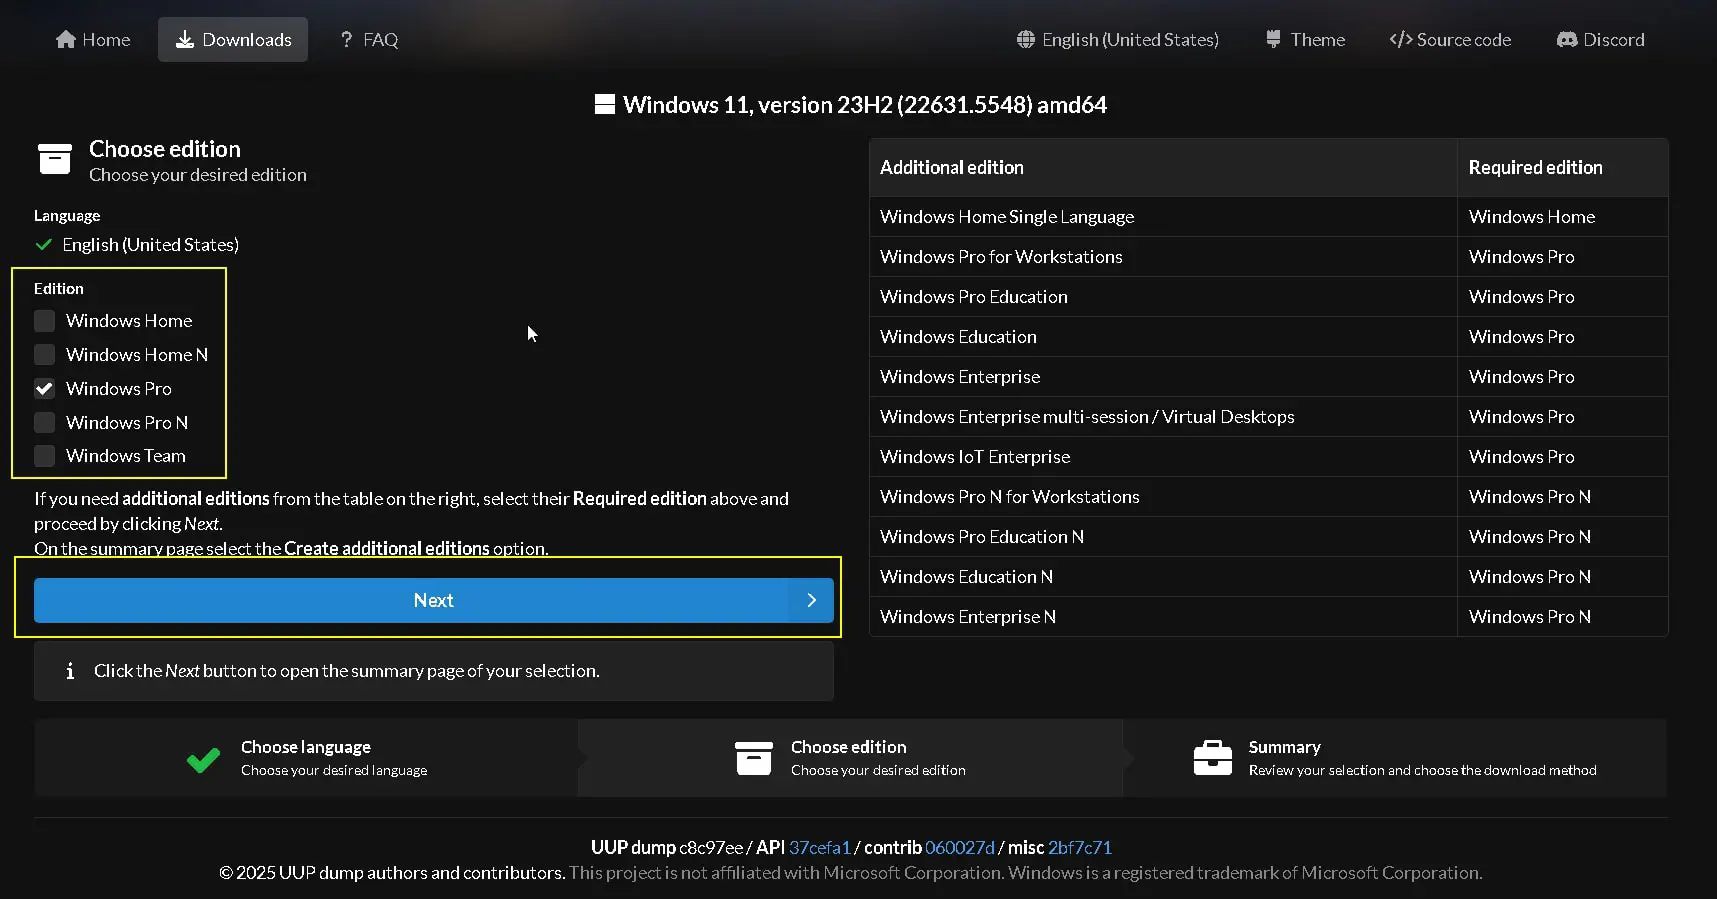
Options for what UUP set you want
Once you select your version, you will be directed to a screen where you can choose your language, select the necessary options, and click Next. Now, you will choose your download options. The ones I will use are shown in the image below. I will do my best to explain the other options as well. I recommend avoiding ESD compression, as I have had some unusual issues with it. Once you are done, you can click “Create Download Package.”
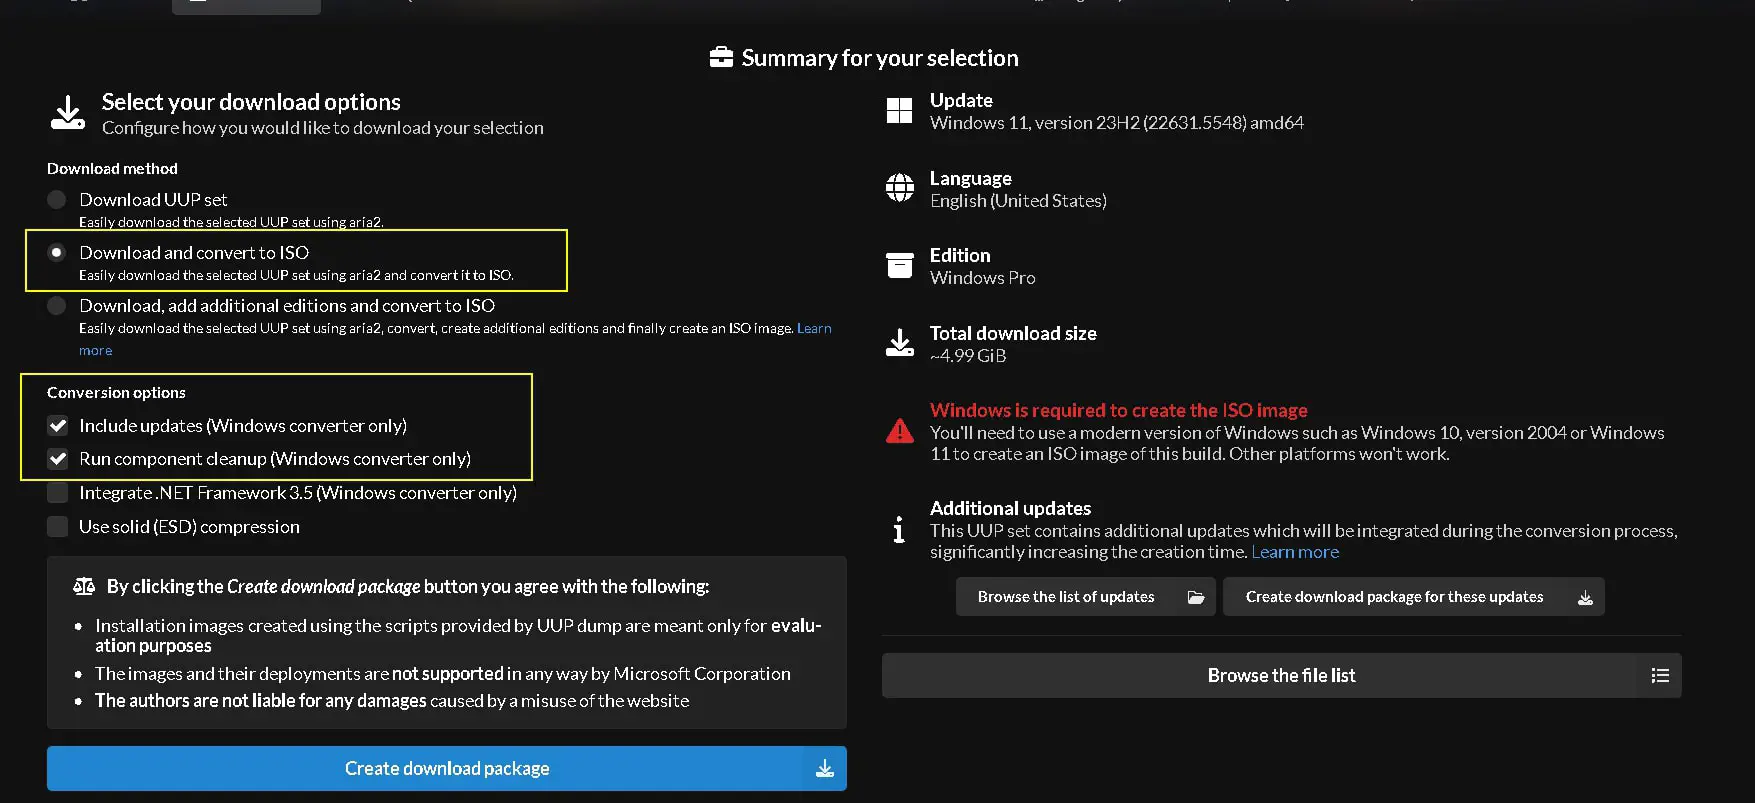
Options for what UUP set you want
Download Method Options
- Download the UUP set
- Downloads the raw UUP (Unified Update Platform) files directly using the aria2 download manager. You will get the original files, but you will need to manually convert them later to use as an ISO
- Download and convert to ISO (selected)
- Downloads the UUP files AND provides you the script that converts them into a bootable ISO image using aria2 for downloading, then runs conversion scripts. This provides you with the quickest route to a ready-to-use ISO
- Download, add additional editions, and convert to ISO - Same as above, but also creates multiple Windows editions (Home, Pro, Enterprise, etc.) in one ISO It is helpful if you want flexibility to install different editions from the same ISO. This results in a larger file but more options
Conversion Options
-
Include updates (Windows converter only) ✓ - Integrates the latest cumulative updates into the installation
-
Run component cleanup (Windows converter only) ✓
- Removes outdated components and files after the update integration - Makes the final ISO smaller and cleaner
- Integrate .NET Framework 3.5 (Windows converter only)
- Adds .NET Framework 3.5 to the installation - Useful if you need legacy .NET support built-in
- Use solid (ESD) compression - Creates a more compressed ISO file (smaller size) - Takes longer to create but saves disk space
1.2 Downloading the files UUP Set files with packaged tools
Once you have downloaded your UUP set, it should be in your downloads directory as a zip file. Here, select the zip file and extract it to the desired location.
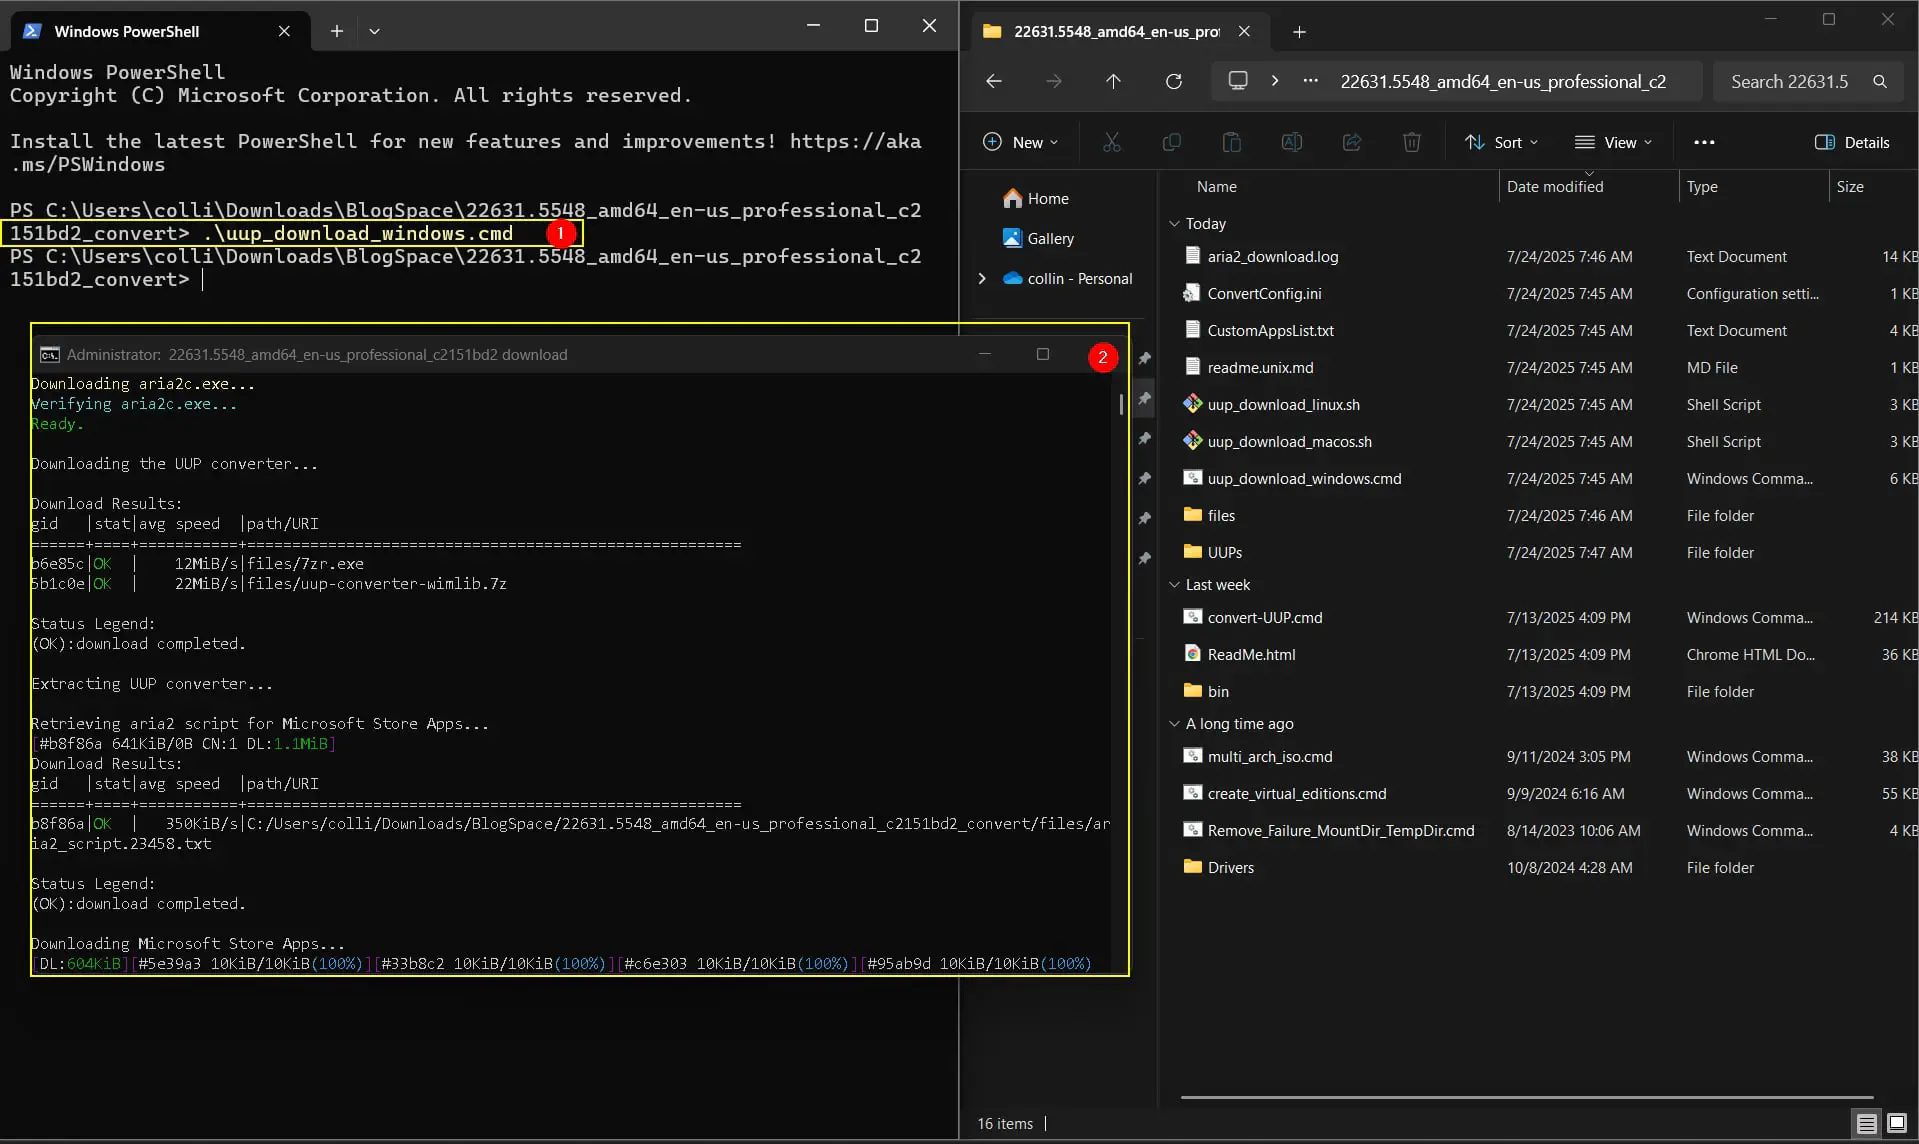
Once that is done, inside the extracted folder, you will find the provided scripts for conversion. Since we are on Windows, we will use the batch file uup_download_windows.cmd. We can right-click on the folder in File Explorer and click “Open in Terminal.” This will bring us straight to where we need to be. You can also navigate here another way; it doesn’t matter.
Once your terminal is open, run the batch script by executing the command .\uup_download_windows.cmd. You can copy and paste this if you are in the same directory as the script.
2. Converting the UUP Files into a Usable ISO
This tool is incredibly feature-rich, so don’t get overwhelmed. We will primarily use the default options in this example. After you complete the download script, you will have a number of extra files; these are the ones that will be built into the image shortly. Detailed instructions can be found in the README file that is downloaded with the files. For our use case, we will choose to edit the ConvertConfig.ini file and change the SkipApps value to 1. This means it will not build the store apps into the image. I plan to use this ISO for a later project, to create a lab environment, so I want a bare minimum Windows image. You can skip the configuration edit if you wish for the apps.
Before we continue, we need to make sure we disable our AV completely while the script works; some features of Windows Defender and other antiviruses may interfere.
Now that we’ve completed the configuration, we can create the ISO by simply running the included script convert-UUP.cmd. This will begin building out ISO.
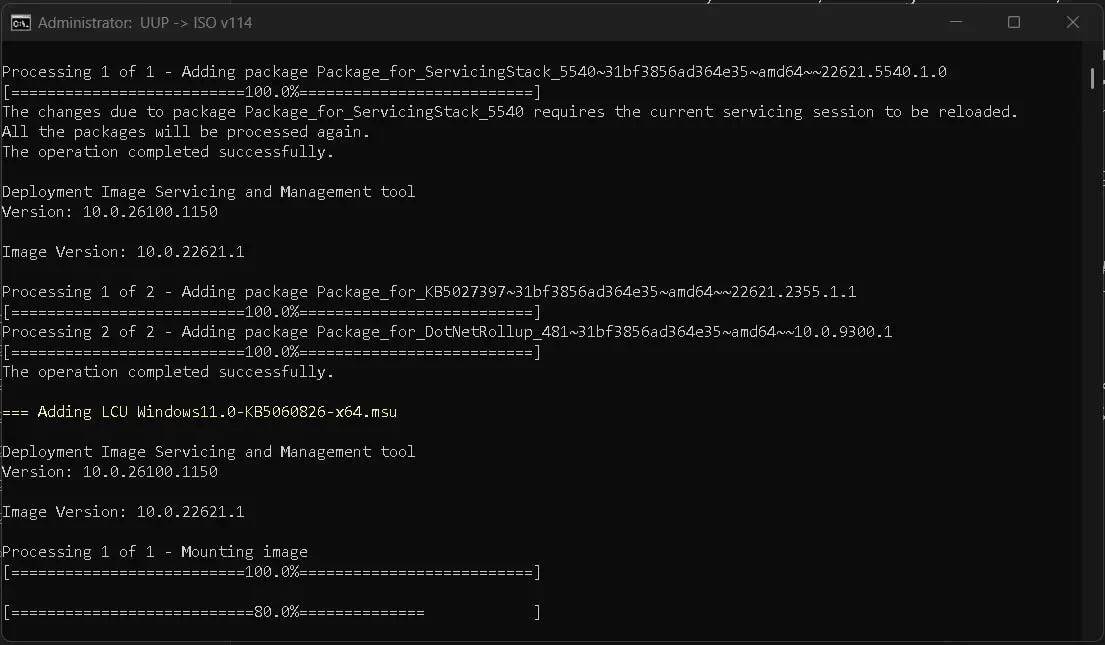
Once this is completed, you should now have a usable ISO file that you can boot from.
Closing Remarks
Some of you may still wonder, “Why is this necessary?”. Well, as of the last couple years, Microsoft has been making it increasinly diffcult to get a copy of Window installation media. This method will most likely always work, and you now are able to create safe, relaible ISOs for whatever you need.
Questions? Email me at [email protected], and I will do my best to assist you.